Sometimes on our hunts, we’ll track down an awesome piece of furniture with a less-than-stellar ____ (fill-in-the-blank). Sometimes it’s a bum leg or drawer. Sometimes it’s rock solid, but the top has taken a beating from years of use and things being placed on it, spilled on it, scratched over it, etc.
Normally, a wrecked top would require tons of sanding and filling, and a lot of time and attention. Not with Chalk Paint®. One of the techniques that my mom teaches and a technique we use is a rustic finish using a heavy, wanton application of this wonderful paint.
I’m not going to give a step-by-step how-to with this post (people pay good money to learn this stuff!), but I’d like to show you some before and afters and hopefully offer a little bit of inspiration.
 \
\
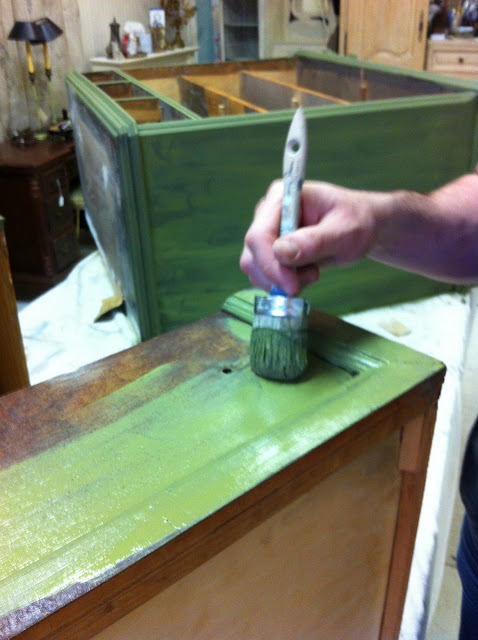
The top of this Gothic chest was probably beyond repair for most. It probably scared a lot of potential buyers away at auction. Not us!
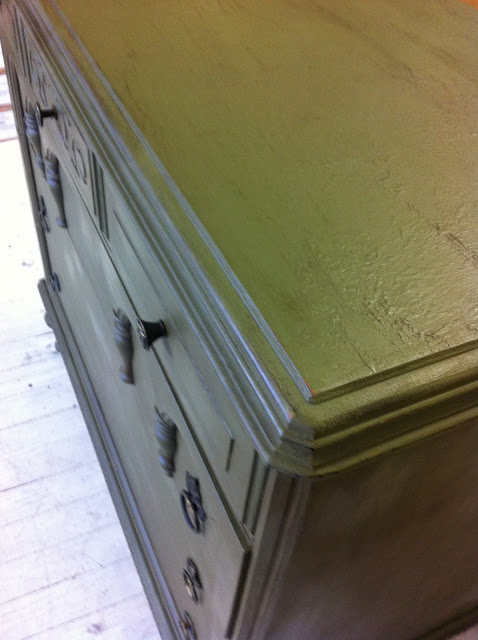
Look at that rustic top. You’d never know how nasty it used to be.

Madison recently went on a little picking adventure of her own and we came away with some really great stuff. We scored a couple of awesome end tables, but for some reason, they were all gunky and junky from stickers or something similar. Rustic finish to the rescue! (Sorry, forgot to snap a before pic)

Nerd alert


Here the paint is still a little wet.

It’s a rough, rustic look, but it still looks super clean to me. This one will get clear and dark wax tomorrow.

Here are a couple of examples where you can see how the rustic finish changes some of the bolder colors like Emperor’s Silk and Antibes. You still get the color, but a totally different result.

That’s all for now, let me know if you’ve tried this finish in the comments!

Hey Jason, I thought you ran away. (Only kidding, you all must be exausted with the new store). I did take the class on AS paint here in Knoxville, Tn. and did the rustic sample. I did it in red, and this is NOT my favorite colors, so I really didnt like it much. However I never thought to use it on a piece that was “un fixable”. Great Idea. Thanks.
Jason, have you tried using a loaded sponge brush with a light hand on the flat surfaces? You can get some nice texture.